


Coconut Cake with Coconut Cream Cheese Frosting
Layers of fluffy, moist coconut cake with decadent coconut cream cheese buttercream, topped with shredded coconut to make it classic. It's what coconut cake dreams are made of!
INGREDIENTS
COCONUT CAKE
- 3 Cups (315g) sifted cake flour* DIY recipe in notes
- 2 tsp baking powder
- 1/2 tsp baking soda
- 1 tsp salt
- 1 Cup (226g) unsalted butter, room temperature
- 1 1/2 Cups (300g) granulated sugar
- 5 large egg whites, room temperature
- 1/3 Cup (76g) sour cream, room temperature
- 2 tsp pure vanilla extract
- 1 tsp coconut extract
- 1 Cup (240ml) canned full-fat coconut milk, room temperature
- 1 Cup (78g) shredded sweetened coconut
COCONUT CREAM CHEESE BUTTERCREAM
- 8 Cups (960g) powdered sugar
- 1/4 Cup (32g) cornstarch (optional)**
- 1 1/2 Cups (339g) unsalted butter, room temperature
- 12 Oz (339g) full-fat cream cheese, block-style***, room temperature
- 2 tsp pure vanilla extract
- 2 tsp coconut extract
- 2 tsp canned full-fat coconut milk, room temperature
- pinch of salt, or to taste
GARNISH
- 1 1/2 Cups sweetened shredded coconut
INSTRUCTIONS
MAKE THE COCONUT CAKE
-
Preheat the oven to 350°F/177ºC. Prepare three 6-inch (15cm) or two 8-inch (20cm) cake pans by spraying the sides with cooking spray and fitting a parchment paper circle to the bottom of the pan.
-
Add the sifted cake flour, baking powder, baking soda, and salt into a medium bowl and whisk to combine. Set aside.
-
In the bowl of your stand mixer fitted with the paddle attachment, beat the butter on high for two minutes until it’s light and creamy. Add the sugar and continue to mix on medium-high for another two minutes, scraping down the bowl and paddle as needed. Turn the mixer to low speed and add the egg whites one at a time, mixing until well combined. Add the sour cream, vanilla extract, and coconut extract and mix for one minute on high. Scrape down the bowl and paddle once more. It will look curdled at this point but don’t worry – it will look like smooth cake batter by the end!
-
Turn the mixer to low, add in the dry ingredients all at once. When they’re just beginning to combine, add the canned coconut milk in a slow, steady stream. Continue to mix on low until incorporated. Scrape the sides and bottom of the bowl and give it a few stirs by hand to make sure there are no large lumps, then gently fold in the shredded coconut.
-
Pour the batter evenly into the prepared cake pans and bake for 35-40 minutes. They’re done when they spring back to the touch and a toothpick inserted into the middle comes out clean. Let the cakes cool in the pan for five minutes before turning them out onto a wire rack for an additional few hours of cooling.
MAKE THE COCONUT CREAM CHEESE BUTTERCREAM
-
Sift together the powdered sugar and cornstarch (if using) and set aside. In the bowl of a stand mixer fitted with the paddle attachment, cream the butter and cream cheese on medium-high until light, fluffy, and uniform (no lumps), about 5 minutes.
-
Turn the mixer to low speed and add the powdered sugar and cornstarch mixture a few cups at a time, mixing thoroughly after each addition and scraping down the bowl and paddle as needed. Add the vanilla extract, coconut extract, coconut milk, and salt and mix on low for another minute, until fully combined and smooth.
ASSEMBLY
-
Once the coconut cakes are completely cooled, level them to your desired height. Add a swipe of coconut cream cheese buttercream onto a cardboard cake circle and place the first cake layer on top. Fill and stack the cake layers with coconut cream cheese buttercream, then crumb coat the cake with a thin layer of coconut cream cheese buttercream. Place the crumb coated cake in the refrigerator for at least 30 minutes to let the frosting firm up.
-
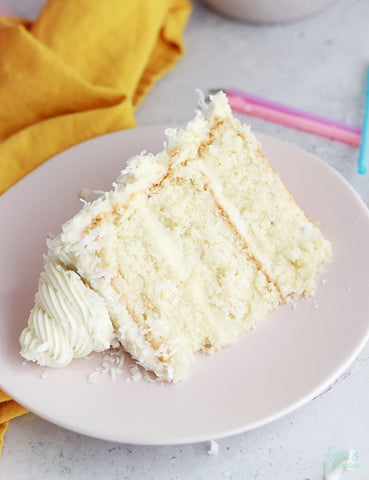
To create the look pictured, frost a smooth buttercream finish with coconut cream cheese buttercream. Place the cake back into the refrigerator for about 15 minutes, until the frosting is slightly set but still tacky, then gently press the shredded coconut onto the sides and top of the cake.
-
Once the sides and top of the cake are covered in coconut, place the remaining coconut cream cheese buttercream into a piping bag fitted with Wilton Tip 4B. Pipe a swirl border on top of the cake and finish with pastel rainbow candles if desired.
NOTES
*DIY Cake Flour Recipe: To make your own cake flour, spoon and level one cup of all-purpose flour and remove 2 Tbsp. Add 2 Tbsp of cornstarch. Repeat per the amount of cake flour you need, then sift the flour and cornstarch mixture 4 times (don’t skip that step!). After sifting, spoon and level to re-measure the amount of cake flour you need.
**Cornstarch helps thicken the consistency of the cream cheese buttercream without adding any flavor/extra sweetness. I highly recommend it if you’re using this frosting to pipe intricate details.
***It’s important to use block-style cream cheese in this recipe because cream cheese spreads contain a lot more liquid and will make your buttercream runny.
Make Ahead Tips:
- The coconut cake layers can be baked, cooled, wrapped in plastic wrap, and left out at room temperature up to two days ahead of decorating. Unfrosted cake layers can be wrapped tightly in plastic wrap and stored in the freezer for up to two months before thawing and frosting.
- The coconut cream cheese buttercream can be made ahead and stored in an airtight container at room temperature for one day. Alternatively, you can store it in an airtight container in the refrigerator for up to two weeks. When you’re ready to use it, bring it back to room temperature and re-whip with your stand mixer to bring it back to piping/frosting consistency.